Turkey Cookies for Thanksgiving
May contain affiliate links. Disclosure policy.
Cut out sugar cookies with buttercream frosting are easy to decorate. Get the tutorial for these cute Turkey Cookies for Thanksgiving!
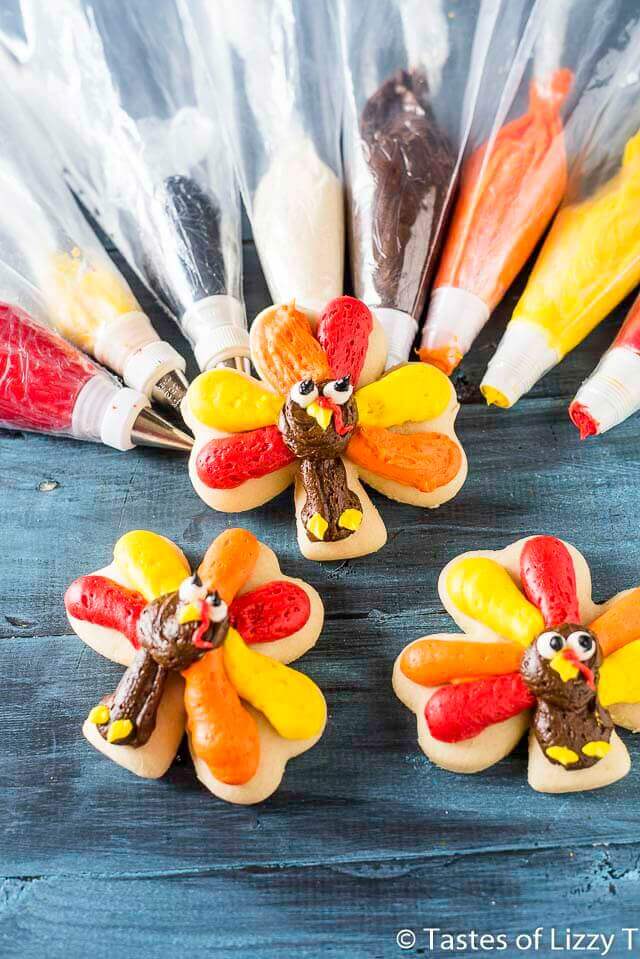
Turkey Cookies for Thanksgiving
It’s the month for all things turkey! Gobbles, feathers and don’t forget Thanksgiving dinner. Are you ready?
I’m thrilled to be sharing with you these turkey cookies for Thanksgiving celebrations. Why? Because I’ve been holding on to this idea for an entire year. I was in our local bakery last November, saw a similar cookie and just knew I had to pass this cuteness on to you.
I’ve got a lot of information for you today, so I’m going to cut the small talk and start right into the tutorial.
What do I need to decorate cookies?
- Cut-out sugar cookies in the shape of a 3-leaf clover. Sneaky how I’m repurposing that cutter that’s only used once a year, huh? I’m going to be sharing a new cutout cookie recipe on Monday (sorry to make you wait), but here’s one of our favorite basic sugar cookies. We also have a peanut butter flavored cut out. Do you have the best cutout cookie recipe already? Use that one. 🙂 My cookie cutter is big, about 4 inches across. As long as it is somewhat shaped like this, you’ll be fine.
- Buttercream frosting. Make up a batch or two of our simple vanilla buttercream. Divide it up, leave about ¼ a cup white, and color the rest red, yellow, orange, brown and black. My favorite type of food coloring is Americolor. Here’s a nice set of basic colors. I find that Americolor food gel food coloring is bright and you’ll use less coloring when trying to get those bright colors. Another reminder for coloring frosting is that the color will deepen as it sits. Make your buttercream a day in advance and you won’t have to use as much food coloring to get the color you desire.
- Disposable frosting bags, plastic wrap, couplers, and Wilton tips 2 (for red), 3 (for black), 7 (for white) and 352 (for yellow beak and feet).
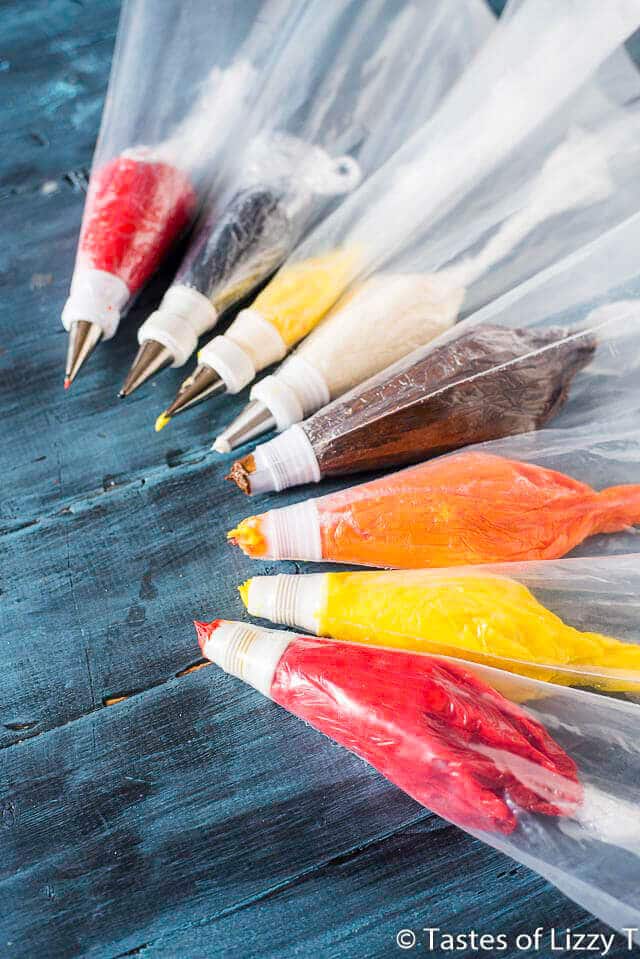
You’ll see in the picture above that for 4 of the bags, I didn’t use a tip. This is because the opening to the coupler was the perfect size for making the feathers and body of the turkey.
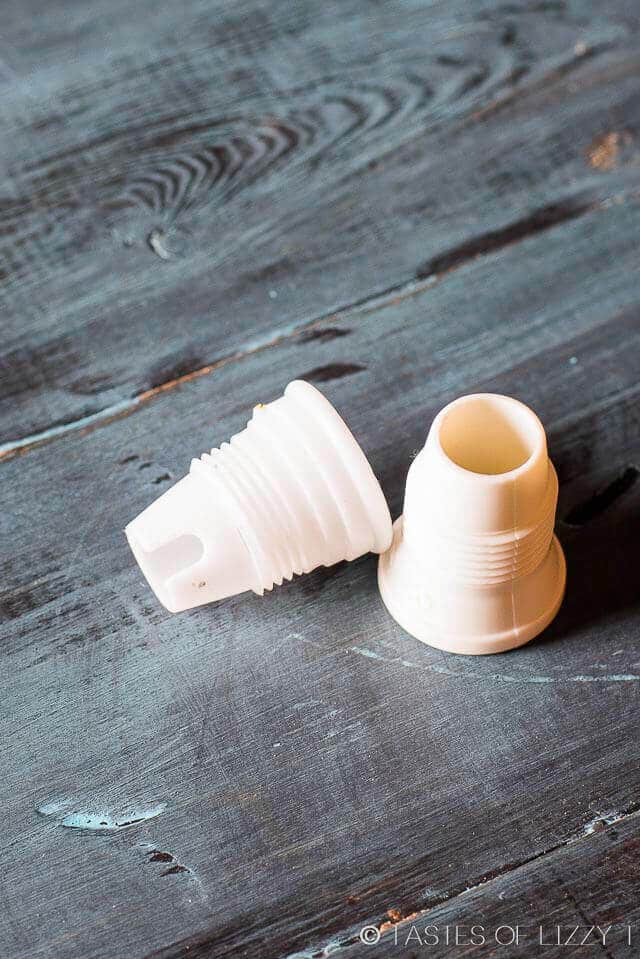
Some couplers are solid around the tip and others have a cut in them as you can see in the picture below. If the cut is facing up, the icing will squeeze out with a raised line on top. If yours have a cut in them, just make sure that part of the tip is facing down and the top of the icing will come out smooth.
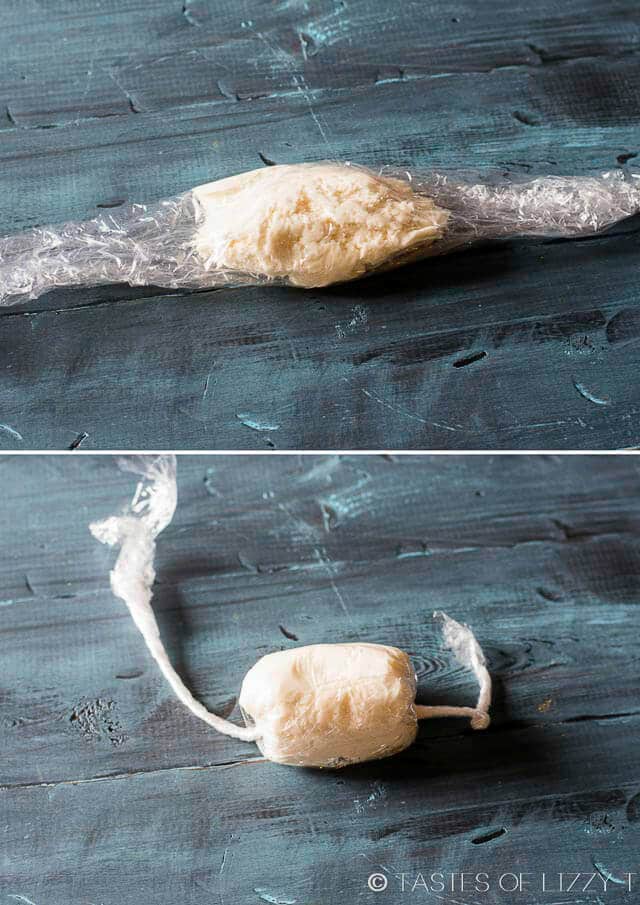
Ready for a fun tip? I’ll share with you a hint for filling your icing bags and keeping cleanup quick. Lay down a small piece of plastic wrap and scoop about 1/2-¾ cup frosting in the center of the plastic wrap.
Roll the frosting up in the plastic wrap, then twist the ends tightly.
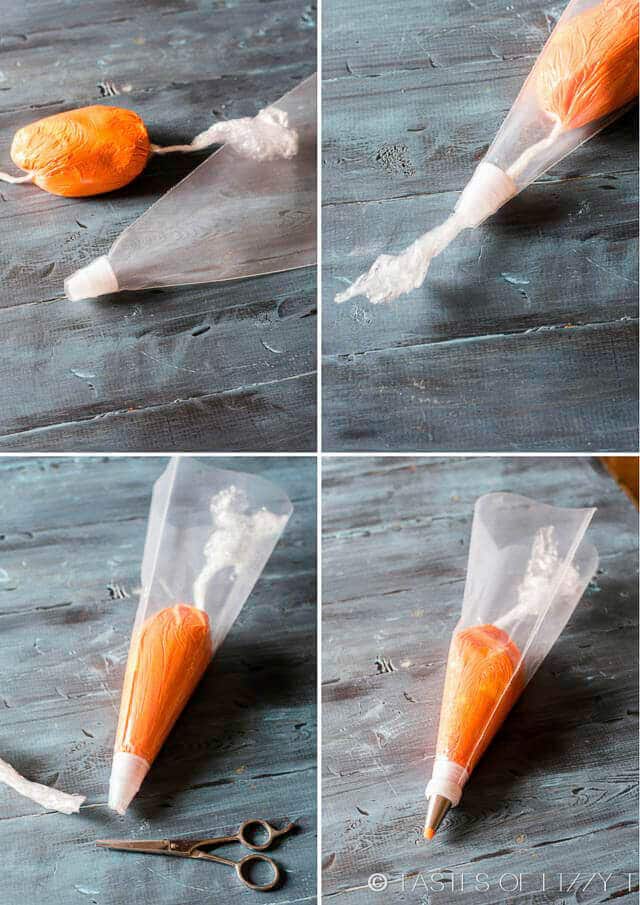
Put the coupler inside a disposable icing bag that you’ve cut the tip off of. Feed the twisted plastic wrap through the coupler hole, bringing the frosting down into the bag. It should still be nice and tightly wrapped in the plastic wrap.
Pull it down as far as you can, then snip the excess plastic wrap off. Add the tip you need and you’re ready to go. Cleanup becomes super easy! The messy frosting stays mostly contained in the plastic wrap, which you’ll pull out and discard once it is empty. I know that these are disposable bags, but I use them over and over. They’re not cheap and I go through a lot of bags!
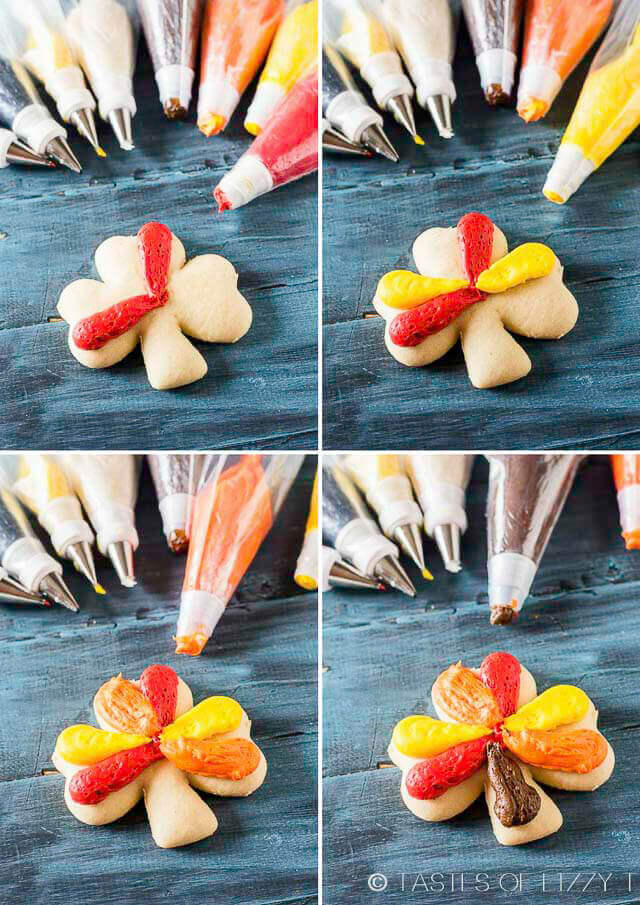
Once you’ve colored your frosting and gotten all of the frosting bags loaded, it’s time to decorate.
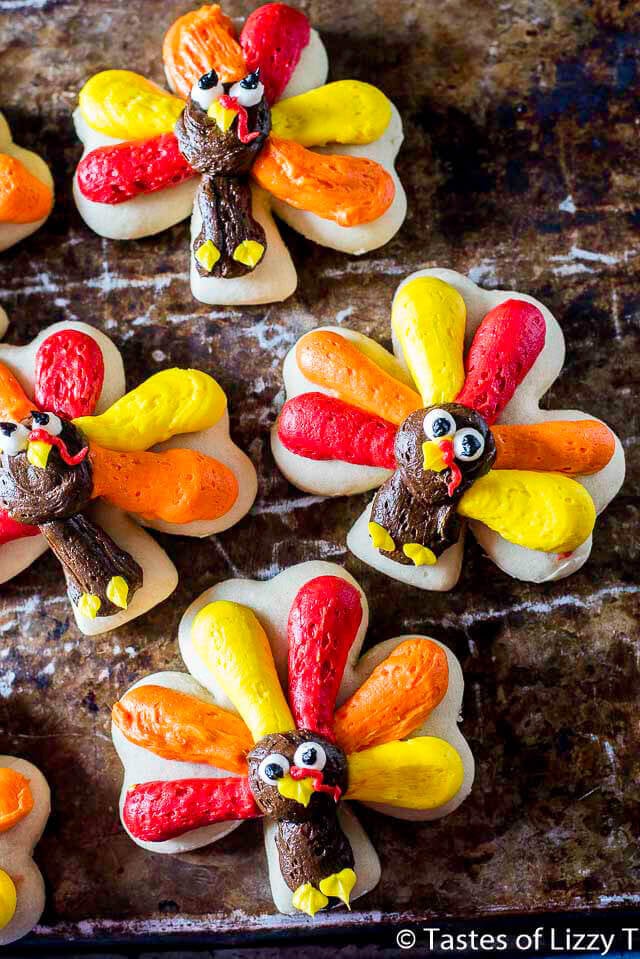
Make the feathers first, starting on the outside edge and squeezing a thick, fluffy line towards the center. The frosting should thin as it comes to the center and be thicker on the outer edge of the feather. Do the same with the yellow and orange colors.
Make the bottom stem of the clover leaf brown in the same manner as you made the feathers.
Now it’s time to make this cute little turkey’s face!
- Use the brown to squeeze out a circle of frosting right in the center where all the colors come together.
- Then use the white (tip 7) to make the eyes.
- Black (tip 3) to make the pupils of the eyes.
- Yellow (tip 352) to make the beak and feet. This tip should be held horizontally to get the right shape. This is simple once you get the hang of it.
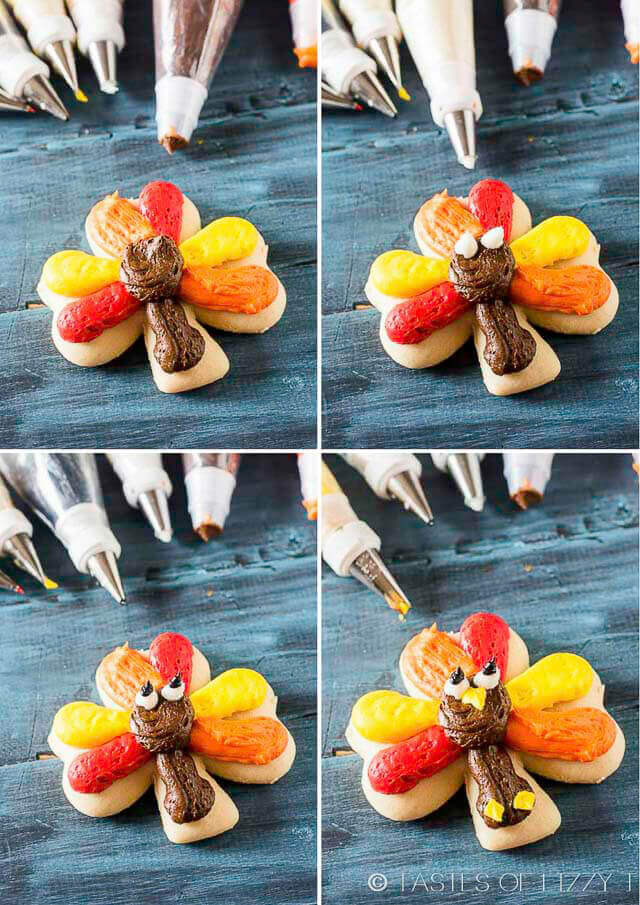
- Lastly, use red (tip 2) to make the snood. I’ll be honest and say that I had to look up what that “little red hanging thing” was on a turkey. Turns out it is a snood. You learn something new every day!
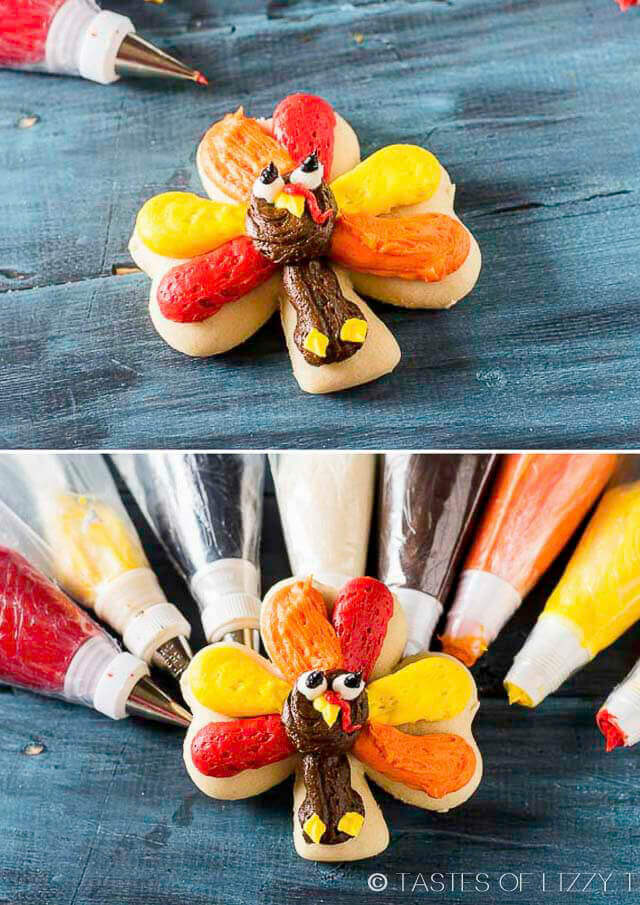
And then you are done! The prep work is the longest part of these cute turkey cookies for Thanksgiving. Once the frosting is made and bags are filled, it doesn’t take long to whip out the decorations. And they are so cute, aren’t they? I made mine a month early so I could share them with you, but they’re safely in the freezer and will go to Grandma’s house on Thanksgiving day.
I’m pretty sure this turkey isn’t any safer than the one that will be stuffed and on my dinner plate, though.
We made a video to show how we decorated the turkeys. Yay! Watch us in action!
Our Favorite Thanksgiving Dinner Side Dishes
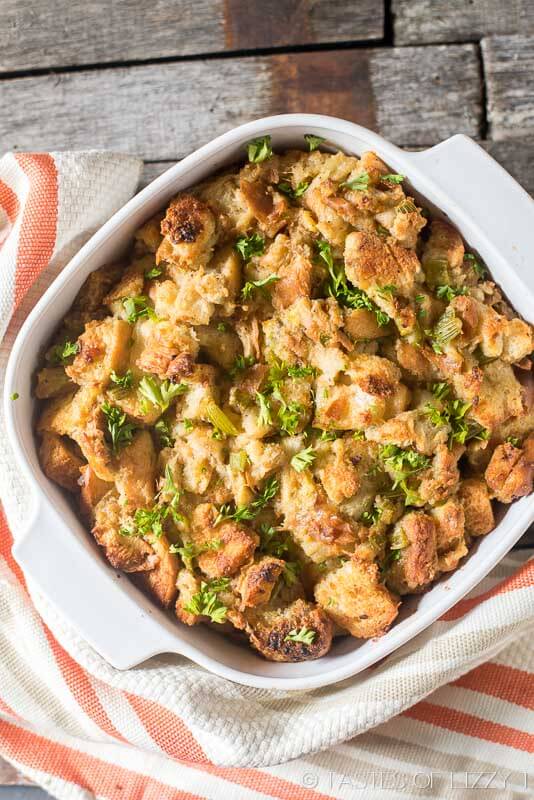
Grandma’s Thanksgiving Turkey Stuffing
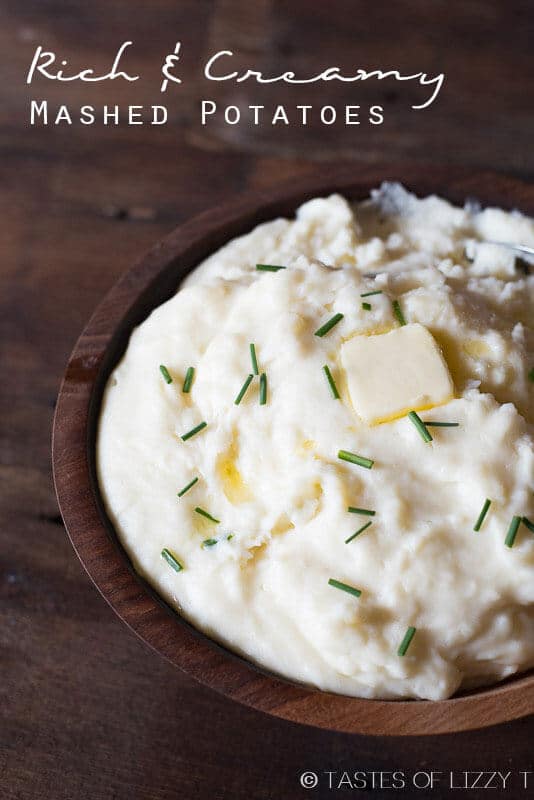
Rich and Creamy Mashed Potatoes




Great idea on the frosting in the Saran Wrap and then put into the bags . bravo!
These little turkey cookies are SO cute! I would love to have these decorating my Thanksgiving table!
Cuteness overload! Thank goodness November has arrived! ‘Hope you don’t have wait for an entire year next time. 🙂