Strawberry Chocolate Galette
May contain affiliate links. Disclosure policy.
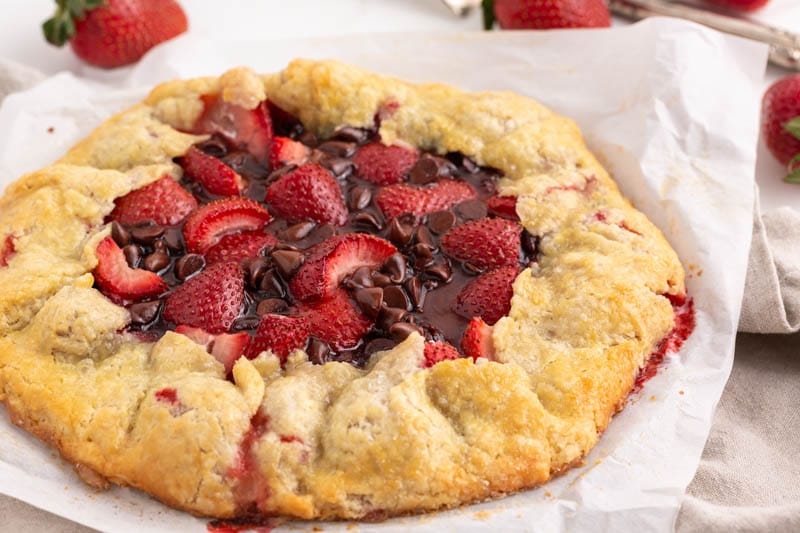
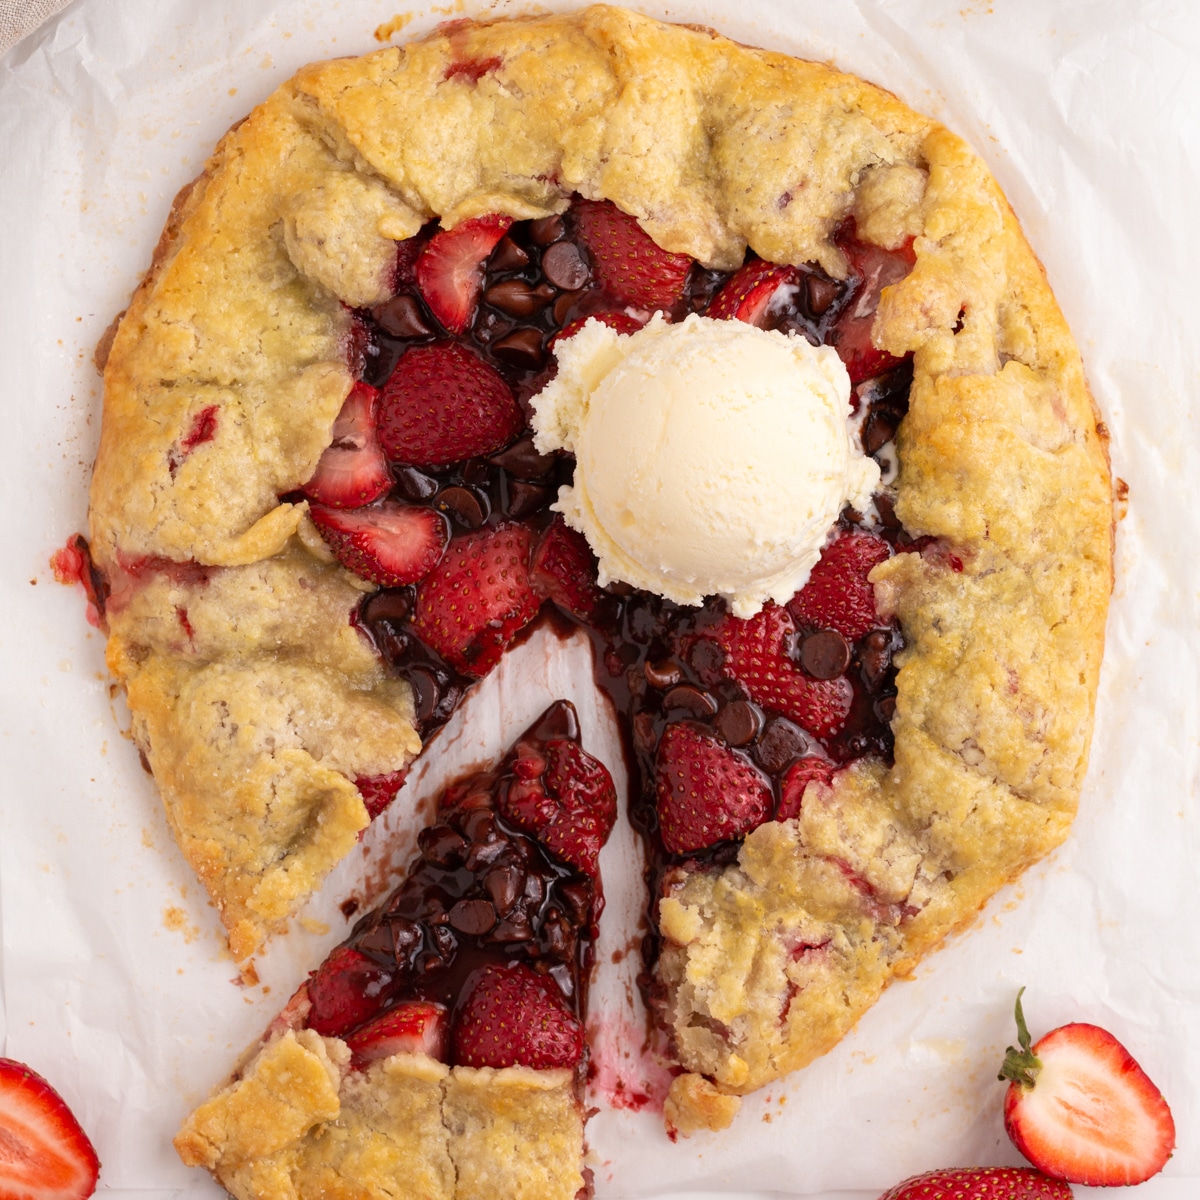
A buttery, super easy homemade pie crust holds a filling of sweetened vanilla strawberries and milk chocolate chips. This Strawberry Chocolate Galette may sound fancy, but it’s the easiest dessert you’ll make this summer.
Table of Contents
Hi. I brought you a pie. It’s a galette, really. Galette is just a fancy schmancy French word for rustic free-form pie. Sometimes we like to say fancy things.
This is precisely why this Strawberry Chocolate Galette is perfect. It looks fancy, it sounds fancy…but is one of the easiest desserts to make.
Galette Pie Dough
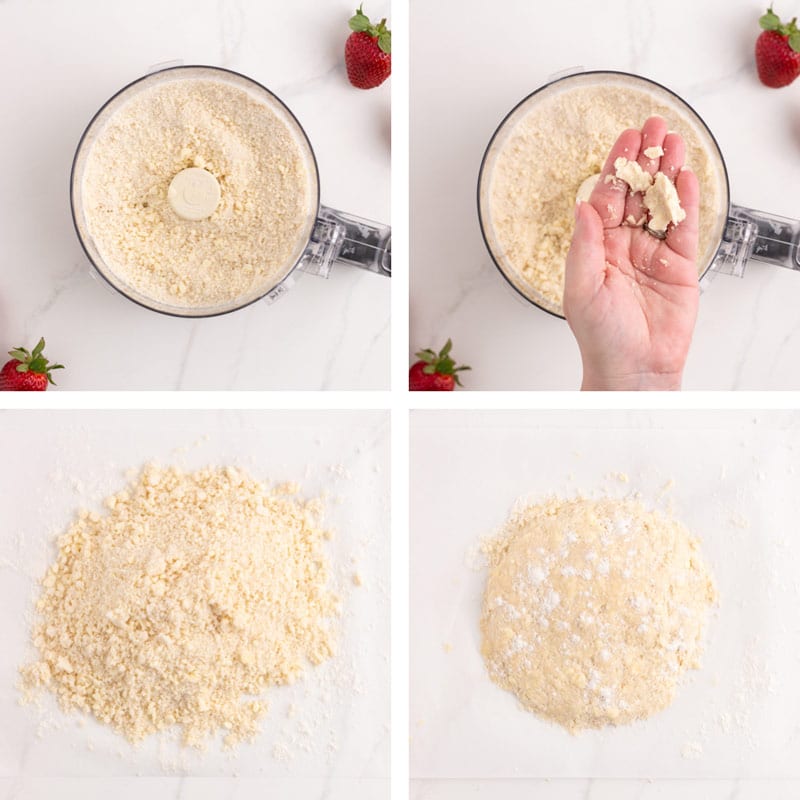
I know, I know – Pie dough can be a pain. All the mixing, rolling, crimping, dealing with these super-hot temperatures. I get it. It’s a pain. What if I told you this pie dough takes less than five minutes to make? Mmm-hmm – That’s right. Less than five minutes.
Making this galette dough is all about having super cold butter. I like to place my butter in the freezer for at least an hour prior to making dough.
Ingredients are measured into a food processor and less than twelve pulses later, I have a pie dough which I wrap and place in the freezer to chill for a bit.
How to Form a Galette
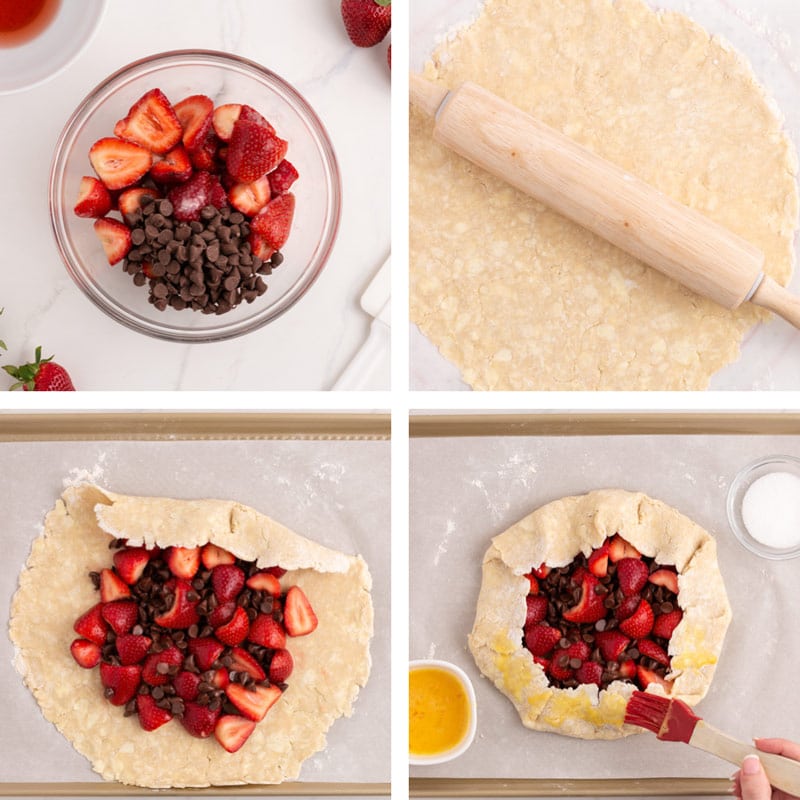
- When it is time to roll, make something that resembles a circle. It doesn’t have to be perfect. It could even resemble something close to a square. Galettes are rustic and meant to be imperfect.
- Now place the strawberry chocolate mixture in the center of this circle/square, leaving a border of pie dough.
- Now fold the border over the fruit, pleating as you go. Again, it does not have to be perfect.
- Brush the outside of the galette dough with an egg wash which will give it a gorgeous golden brown color and place for the sugar to stick to.
How to I keep my galette from being soggy?
There are three things I do to help prevent the galette from becoming soggy. Because let’s face it. Fruit is juicy and it can add too much moisture to the end result of a recipe.
- Macerate the strawberries, then drain them. Macerating the strawberries in sugar will pull out some of that juice so that you can then drain it off.
- Mix the strawberries with cornstarch. Cornstarch is a thickening agent and will help thicken the filling of the strawberry galette.
- Serve while it is warm. The longer this sits, the juicier it may become, so serve it right away.

Strawberry Chocolate Galette
A buttery, super easy homemade pie crust holds a filling of sweetened vanilla strawberries and milk chocolate chips. This Strawberry Chocolate Galette may sound fancy, but it’s the easiest dessert you’ll make this summer!
Servings 8
Prep Time 15 minutes
Cook Time 30 minutes
Total Time 45 minutes
Ingredients
For the macerated Strawberries
- 2 ½ cups medium sized strawberries hulled and sliced in half
- 3 tablespoons granulated sugar
- 1 tablespoon vanilla extract
- 2 teaspoons cornstarch
- ½ cup milk chocolate chips
For the pie crust:
- 1 ¼ cup all-purpose flour spooned then leveled
- ½ teaspoon salt
- 3 tablespoons granulated sugar
- ½ cup unsalted butter very cold and cut into ½ inch cubes
- 2-4 tablespoons ice water
- 1 large egg beaten
- granulated sugar for sprinkling
For serving:
- vanilla ice cream
Instructions
Macerate the strawberries:
- In a medium bowl, combine strawberries, sugar, and vanilla extract. Stir to combine and allow to macerate until the sugar dissolves and the fruit softens.
- Drain the fruit of its syrup. Discard syrup or use for another use.
- Sprinkle the cornstarch over the strawberries and mix to combine. Add the chocolate chips. Place in the refrigerator until ready to use.
Make the pie crust:
- About an hour before you plan to make your pie crust, place the butter cubes in the freezer. The colder the butter, the better your chances of achieving a nice flaky crust.
- Once your butter is sufficiently chilled, place the flour, salt, and sugar in a food processor. Pulse about 5 times until flour, salt, and sugar are combined. Add the butter cubes and pulse until the mixture resembles coarse meal, about 12 pulses total. You should be left with quite a few pea size pieces of butter.
- Remove ice from your water, add 2 tablespoons of water to the food processor and plus 2-3 times. Add water 1 tablespoon at a time, pulsing with each addition. The mixture should just barely clump together at this point, yet have a crumbly look to it. Test by pinching some of the dough and if it comes together, then it’s ready to use. If not, keep adding one tablespoon of water at a time, giving it 2-3 pulses each time. I’ve made this crust many times and it’s never taken more than 4 tablespoons of water. Make sure you don’t add too much; otherwise your crust won’t be flaky.
- Turn the crumbly dough over a lightly flour surface and gather it into a rough circle. Handle the dough as carefully as possible so as not to activate too much gluten which can toughen your pie crust. Your pie crust should be dotted with gorgeous pieces of butter. Lightly sprinkle flour over surface of the dough.
- Cover the dough with plastic wrap and place in the refrigerator for at least one hour to chill. If using the dough another day, place in the freezer. When ready to use, defrost it in the refrigerator overnight. Dough keeps well in the freezer for about a month.
Assemble and bake the galette:
- Preheat the oven to 350ºF and set a large cookie sheet on your counter. Tape the corners of a rectangular sheet of parchment paper on your counter and lightly flour it.
- Remove the pie dough from the refrigerator. Turn the dough onto the lightly floured rectangle of parchment paper. Lightly sprinkle the top with flour and with a rolling pin, roll a circle that’s roughly 12-14 inches in diameter and about ⅛ of an inch thick, giving the dough a quarter turn as you roll.
- To make sure the dough doesn’t stick underneath, lift the dough every couple of turns and lightly sprinkle with flour underneath as needed. If your circle doesn’t turn out perfect, that is OK. We’re not going for perfection here. Place the dough in the refrigerator for about 15 minutes.
- After 15 minutes or so remove the pie dough, from the refrigerator. Sprinkle the strawberry/chocolate mixture in the center of the pie dough, patting it down a bit, leaving about a 2-inch border of pie dough.
- Fold the border over the strawberry/chocolate mixture, pleating the edges as best you can. Again, it doesn’t have to be perfect. The center of the galette should remain open with the fruit exposed. Remove tape from sides of parchment paper and carefully transfer the parchment with the prepared galette onto the cookie sheet. Brush the edges of the galette with beaten egg and sprinkle the surface with granulated sugar.
- Place cookie sheet in the oven and bake until the edges of the galette are a nice golden brown, about 25-30 minutes.
- Remove galette from the oven and allow to cool slightly, about 5 minutes. Slice and serve with vanilla ice cream if desired.
Notes
Refer to the article above for more tips and tricks.
The calories shown are based on the galette being cut into 8 pieces, with 1 serving being 1 slice. Since different brands of ingredients have different nutritional information, the calories shown are just an estimate. **We are not dietitians and recommend you seek a nutritionist for exact nutritional information. The information in the nutrition box are calculated through a program and there is room for error. If you need an accurate count, I recommend running the ingredients through your favorite nutrition calculator.**
Nutrition
Calories: 294kcal | Carbohydrates: 36g | Protein: 4g | Fat: 15g | Saturated Fat: 9g | Polyunsaturated Fat: 1g | Monounsaturated Fat: 3g | Trans Fat: 1g | Cholesterol: 55mg | Sodium: 165mg | Potassium: 104mg | Fiber: 2g | Sugar: 19g | Vitamin A: 419IU | Vitamin C: 27mg | Calcium: 31mg | Iron: 1mg




I made this tonight at it was absolutely delicious. Not to mention, so easy to follow. First time making my own “pie crust of sorts” from scratch. I even had some extra dough leftover so I cut out little leaf designs and and placed them on top of the folded crusts. Looked beautiful! I was afraid to burn it, so I think I took it out a minute too early… I’d probably go for the full 30 minutes, but I know that depends on the oven.
Thanks so much for this recipe!